[Fwog is a] Low-level OpenGL 4.6 abstraction written in C++20. Fwog mitigates many of the weak points of OpenGL while providing a modern interface
Description from Fwog’s GitHub repository
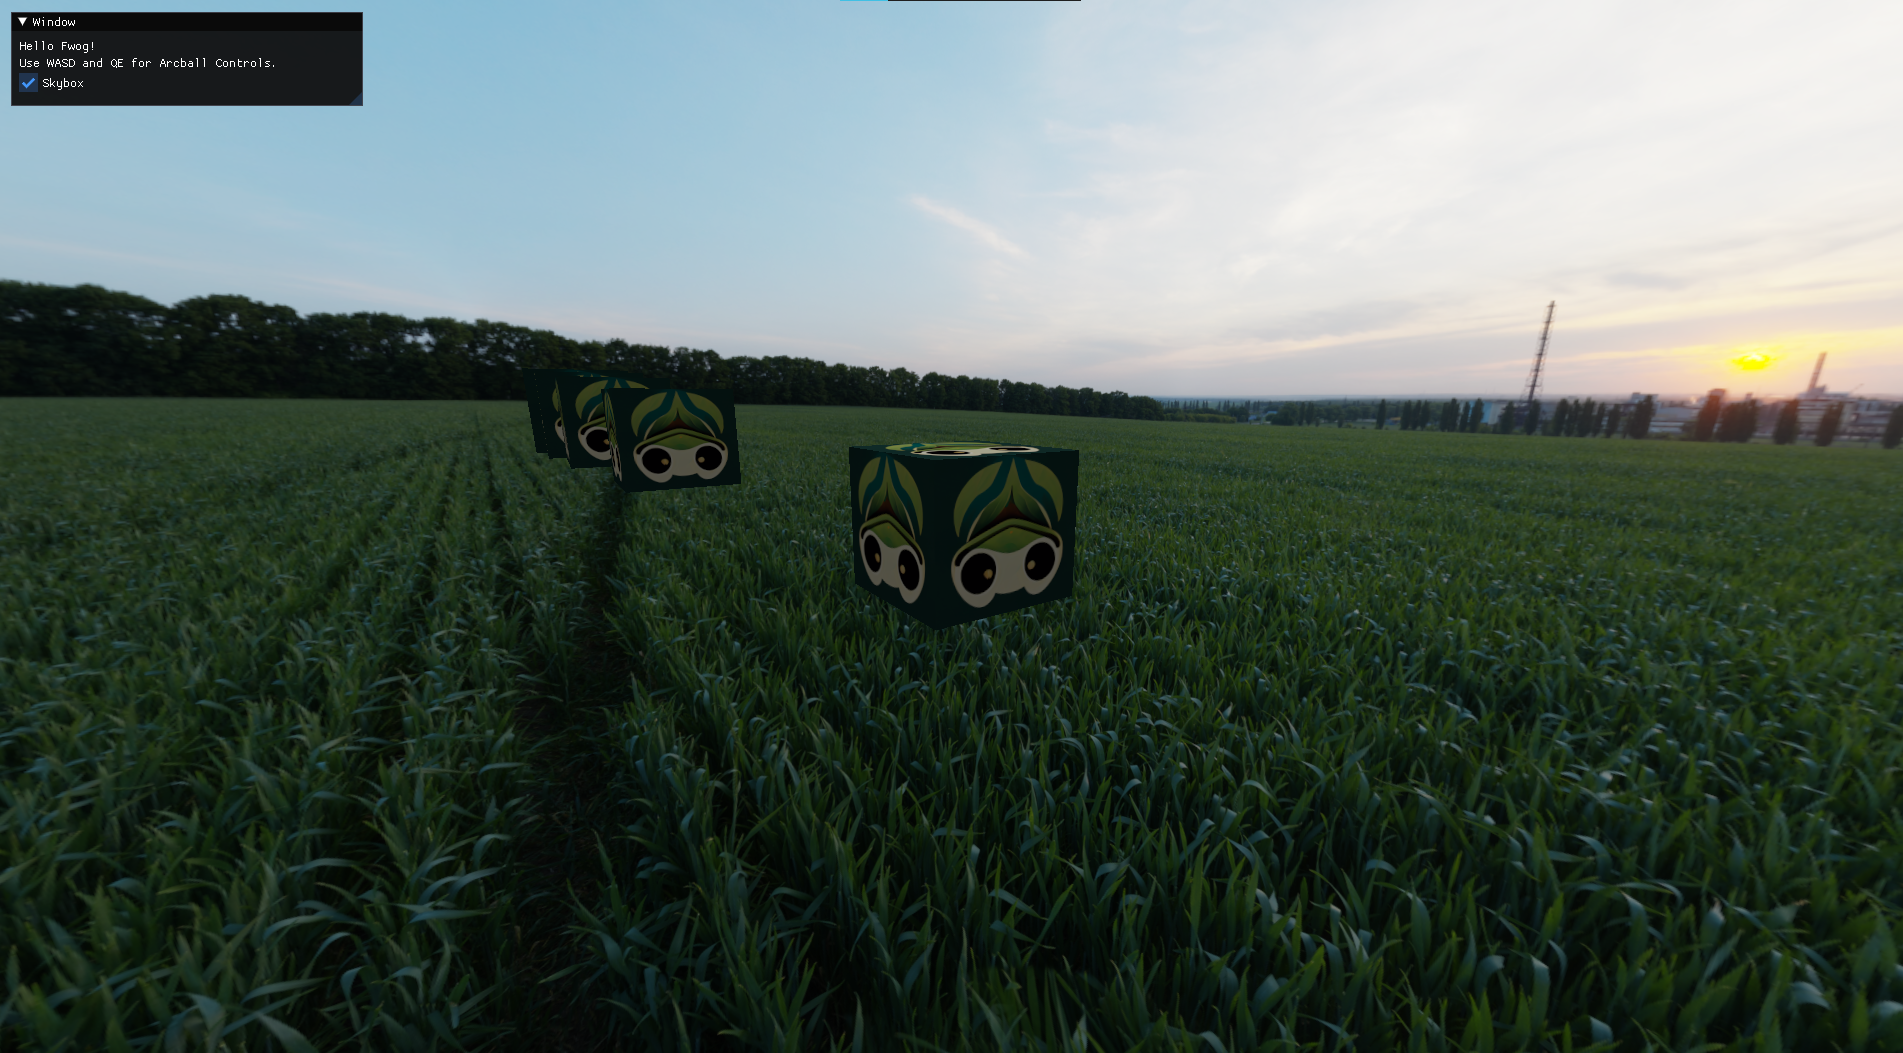
This post describes my experience with an online friend’s OpenGL abstraction library affectionately named Fwog. Its name comes as part of an inside joke involving frogs with the community we share. This is also why its mascot is also frog themed.
To be upfront, my impressions of Fwog was generally quite positive when using it in own Plane Game project. I had also created a starting template for the project based off what I had learned using it for a game. In the words of an academic journal, this would be my ‘conflict of interest’ for describing this library.
I hope that by describing what I liked about it in this post, I could convince more people to give it a try or at least see its value. I will detail why I chose to experiment with the framework, code examples of one way to use it and how I felt about the framework in the end.
Why Fwog?
In short, here is a summary of what made Fwog appealing to me. This section also elaborates on these points in further detail.
- Fwog is openly inspired by Vulkan’s API, which uses pipeline objects and draw commands.
- It handles and abstracts away OpenGL’s global states using Direct State Access, which allows easier debugging.
- The creator of Fwog is active and easy to collaborate with on a community that I am involved in.
- Clear examples provided in the main repository that allowed me to easily get started.
One of the appeals that drawn me to Fwog is its clear Vulkan influences. Fwog uses abstractions inspired by Vulkan such as pipelines objects and draw commands created a workflow that reminded me much of my time using Vulkan in my undergrad classes. The encapsulation of OpenGL’s global state also allowed much easier debugging and cleaner code but without the extra overhead of worrying about synchronization using fences and semaphores which are required in Vulkan.
While it is true that Modern OpenGL reduces the occurrences of such bugs by through Direct State Access, I appreciated that Fwog goes one step further by encouraging you to use pipeline objects to associate samplers, uniform bindings and shaders together into the draw call.
The creator of Fwog, Jake Ryan (JuanDiegoMontoya) has a strong understanding of the strengths and weaknesses of modern OpenGL as written in his blog post titled ‘Best Practices for Modern OpenGL’. He is also someone I could easily contact and enjoying talking with, which helped inspire the idea of fully testing Fwog by using it in an actual 3D game project prototype with a full gameplay loop.
With all these factors, it was inviting to jump in and support the project as I could help contribute to it by using it sincerely in my own applications. This also allowed me to make pull requests and bug fixes while having fun with a new way to interface with OpenGL.
So how do I make anything with Fwog?
This section assumes the reader has had some familiarity with using graphical APIs like WebGL, OpenGL or Vulkan to render graphics and knows what they are looking for, rather than acting as a full step-by-step tutorial. The reader should feel free to skip to the next section if they are uninterested in writing code with the Fwog library.
The following code examples are from a Fwog starter template that I had created after using Fwog to make the prototype aircraft flying arcade game. The links provided under the text code snippet are permalinks to the relevant sections inside the repository.
Pipeline Objects
This snippet demonstrates one way to construct pipeline objects, passing in shader paths. It could potentially be further improved to pass in the binding descriptor sets too if the user requires it.
1
2
3
4
5
6
7
8
9
10
11
12
13
14
15
16
17
18
19
20
21
22
23
24
25
26
27
28
29
30
31
32
33
34
35
36
37
38
39
40
41
42
43
44
45
46
47
48
49
50
51
52
Fwog::GraphicsPipeline ProjectApplication::MakePipeline(std::string_view vertexShaderPath, std::string_view fragmentShaderPath)
{
    auto LoadFile = [](std::string_view path)
    {
        std::ifstream file{ path.data() };
        std::string returnString { std::istreambuf_iterator<char>(file), std::istreambuf_iterator<char>() };
        return returnString;
    };

    auto vertexShader = Fwog::Shader(Fwog::PipelineStage::VERTEX_SHADER, LoadFile(vertexShaderPath));
    auto fragmentShader = Fwog::Shader(Fwog::PipelineStage::FRAGMENT_SHADER, LoadFile(fragmentShaderPath));

    //Ensures this matches the shader and your vertex buffer data type

    static constexpr auto sceneInputBindingDescs = std::array{
        Fwog::VertexInputBindingDescription{
            // position
            .location = 0,
            .binding = 0,
            .format = Fwog::Format::R32G32B32_FLOAT,
            .offset = offsetof(Primitives::Vertex, position),
    },
    Fwog::VertexInputBindingDescription{
            // normal
            .location = 1,
            .binding = 0,
            .format = Fwog::Format::R32G32B32_FLOAT,
            .offset = offsetof(Primitives::Vertex, normal),
    },
    Fwog::VertexInputBindingDescription{
            // texcoord
            .location = 2,
            .binding = 0,
            .format = Fwog::Format::R32G32_FLOAT,
            .offset = offsetof(Primitives::Vertex, uv),
    },
    };

    auto inputDescs = sceneInputBindingDescs;
    auto primDescs =
        Fwog::InputAssemblyState{Fwog::PrimitiveTopology::TRIANGLE_LIST};

    return Fwog::GraphicsPipeline{{
            .vertexShader = &vertexShader,
            .fragmentShader = &fragmentShader,
            .inputAssemblyState = primDescs,
            .vertexInputState = {inputDescs},
            .depthState = {.depthTestEnable = true,
            .depthWriteEnable = true,
            .depthCompareOp = Fwog::CompareOp::LESS},
        }};
}
This creates a clear association between valid uniform handles and names. We then also have to create buffers for our vertices, both for the vertices and for uniforms that are passed into the shaders.
Draw Commands
The following code snippet shows an example of a user-made DrawObject structure type which I had created for the template as a simple example of an abstraction. This is used to associate vertex and index buffers together which can in turn be used by GameObject or Component type abstractions.
1
2
3
4
5
6
7
8
9
10
11
12
13
14
template <typename T1, typename T2>
DrawObject DrawObject::Init(T1 const& vertexList, T2 const& indexList, size_t indexCount)
{
    DrawObject object;
    object.vertexBuffer.emplace(vertexList);
    object.indexBuffer.emplace(indexList);
    object.modelUniformBuffer =  Fwog::TypedBuffer<DrawObject::ObjectUniform>(Fwog::BufferStorageFlag::DYNAMIC_STORAGE);
    object.modelUniformBuffer.value().SubData(object.objectStruct, 0);

    //Fwog takes in uint32_t for the indexCount but .size() on a container returns size_t. I'll just cast it here and hope its fine.
    object.indexCount = static_cast<uint32_t>(indexCount);

    return object;
}
Finally, this next example shows one way that the drawing draw command are invoked. For anyone who had worked in Vulkan, this might feel very familiar.
1
2
3
4
5
6
7
8
9
10
11
    auto drawObject = [&](DrawObject const& object, Fwog::Texture const& textureAlbedo, Fwog::Sampler const& sampler, Camera const& camera)
    {
        Fwog::Cmd::BindGraphicsPipeline(pipelineTextured.value());
        Fwog::Cmd::BindUniformBuffer(0, camera.cameraUniformsBuffer.value());
        Fwog::Cmd::BindUniformBuffer(1, object.modelUniformBuffer.value());

        Fwog::Cmd::BindSampledImage(0, textureAlbedo, sampler);
        Fwog::Cmd::BindVertexBuffer(0, object.vertexBuffer.value(), 0, sizeof(Primitives::Vertex));
        Fwog::Cmd::BindIndexBuffer(object.indexBuffer.value(), Fwog::IndexType::UNSIGNED_INT);
        Fwog::Cmd::DrawIndexed(object.indexCount, 1, 0, 0, 0);
    };
(In hindsight, the name of the function should have been called ‘Draw’ instead)
Uniform Binding Objects (Projection View Matrix)
In the template, the ‘Camera’ class contained the uniform buffers for the view and projection matrices together for easier prototyping and demonstration, especially in regards to showcasing how to create a simple skybox.
The camera is updated in the following example. Its projection and view matrices are recalculated only if there is a change in the view matrix. (Technically the projection matrix could be cached but it was a simple prototype.)
1
2
3
4
5
6
7
8
9
10
11
12
13
14
void Camera::Update()
{
    glm::mat4 view = glm::lookAt(camPos,  target,  up);
    glm::mat4 viewSky = glm::mat4(glm::mat3(view));
    glm::mat4 proj = glm::perspective(PI / 2.0f, 1.6f, nearPlane, farPlane);

    cameraStruct.viewProj = proj * view;
    cameraStruct.eyePos = camPos;
    cameraUniformsBuffer.value().SubData(cameraStruct, 0);

    cameraStruct.viewProj = proj * viewSky;

    cameraUniformsSkyboxBuffer.value().SubData(cameraStruct, 0);
}
As a side note, this camera class was further improved in my main codebase of Albuquerque to be detached from rendering logic.
One common technique to create the skybox illusion when using cubemapping is to pass in a view matrix to the shader that does not contain the translation data, in order to make the distant textures resembling scenery look very far away as the camera is always in the ‘center’ of the cube. As shown in the earlier camera code, this was accomplished in the example by reducing the existing view matrix from a 4x4 matrix into a 3x3 one and then converting it back to 4x4 (with the translations now being zero). I could pass that into the separate skybox’s version of the buffer representing the view projection matrix.
Creating the cubemap that would be used in the skybox was undocumented at the time I had attempted it, but I figured it out by cross-referencing documentation for glTextureSubImage3D as seen in the earlier mentioned Modern OpenGL guide and the source code for Fwog. The following code snippet showcases the function I created for the template as an example.
1
2
3
4
5
6
7
8
9
10
11
12
13
14
15
16
17
18
19
20
21
22
23
24
25
26
27
28
29
30
31
32
33
34
35
36
37
38
39
40
41
42
43
44
45
46
47
48
49
50
51
52
53
54
55
56
57
58
59
60
61
62
63
64
65
66
67
68
69
70
71
72
73
74
75
76
77
78
79
80
81
82
83
84
85
86
87
88
89
90
91
Fwog::Texture Skybox::MakeTexture()
{
    using namespace Fwog;

    int32_t textureWidth, textureHeight, textureChannels;
    constexpr int32_t expected_num_channels = 4;

    unsigned char* textureData_skybox_front =
        stbi_load("./data/textures/skybox/front.png", &textureWidth, &textureHeight,
            &textureChannels, expected_num_channels);
    assert(textureData_skybox_front);

    unsigned char* textureData_skybox_back =
        stbi_load("./data/textures/skybox/back.png", &textureWidth, &textureHeight,
            &textureChannels, expected_num_channels);
    assert(textureData_skybox_back);

    unsigned char* textureData_skybox_left =
        stbi_load("./data/textures/skybox/left.png", &textureWidth, &textureHeight,
            &textureChannels, expected_num_channels);
    assert(textureData_skybox_left);

    unsigned char* textureData_skybox_right =
        stbi_load("./data/textures/skybox/right.png", &textureWidth, &textureHeight,
            &textureChannels, expected_num_channels);
    assert(textureData_skybox_right);

    unsigned char* textureData_skybox_up =
        stbi_load("./data/textures/skybox/up.png", &textureWidth, &textureHeight,
            &textureChannels, expected_num_channels);
    assert(textureData_skybox_up);

    unsigned char* textureData_skybox_down =
        stbi_load("./data/textures/skybox/down.png", &textureWidth, &textureHeight,
            &textureChannels, expected_num_channels);
    assert(textureData_skybox_down);

    // https://www.khronos.org/opengl/wiki/Cubemap_Texture
    const uint32_t right_id = 0;
    const uint32_t left_id = 1;
    const uint32_t up_id = 2;
    const uint32_t down_id = 3;

    // front instead of forwrad to match the cubemap naming
    const uint32_t front_id = 4;
    const uint32_t back_id = 5;

    uint32_t num_cube_faces = 6;

    Fwog::TextureCreateInfo createInfo{
        .imageType = ImageType::TEX_CUBEMAP,
        .format = Fwog::Format::R8G8B8A8_SRGB,
        .extent = {static_cast<uint32_t>(textureWidth),
        static_cast<uint32_t>(textureHeight)},
        .mipLevels =
        uint32_t(1 + floor(log2(glm::max(textureWidth, textureHeight)))),
        .arrayLayers = 1,
        .sampleCount = SampleCount::SAMPLES_1,
    };

    Fwog::Texture texture = Fwog::Texture(createInfo);


    auto upload_face = [&](uint32_t curr_face,
        unsigned char* texture_pixel_data) {
            Fwog::TextureUpdateInfo updateInfo{
                .dimension = Fwog::UploadDimension::THREE,
                .level = 0,
                .offset = {.depth = curr_face},
                .size = {static_cast<uint32_t>(textureWidth),
                static_cast<uint32_t>(textureHeight), 1},
                .format = Fwog::UploadFormat::RGBA,
                .type = Fwog::UploadType::UBYTE,
                .pixels = texture_pixel_data};
            texture.SubImage(updateInfo);

            stbi_image_free(texture_pixel_data);
    };

    upload_face(right_id, textureData_skybox_right);
    upload_face(left_id, textureData_skybox_left);
    upload_face(up_id, textureData_skybox_up);
    upload_face(down_id, textureData_skybox_down);
    upload_face(front_id, textureData_skybox_front);
    upload_face(back_id, textureData_skybox_back);

    texture.GenMipmaps();

    return texture;
}
The user that now choose to draw them before drawing anything else, use the depth buffer forced fail optimization in the shader to prevent additional fragment depth buffer checks. The code snippet below shows this example.
1
2
3
4
5
6
7
8
9
10
11
12
    auto drawSkybox = [&](Skybox const& skybox, Fwog::Sampler const& sampler, Camera const& camera)
    {
        Fwog::Cmd::BindGraphicsPipeline(skybox.pipeline.value());
        Fwog::Cmd::BindUniformBuffer(0, camera.cameraUniformsSkyboxBuffer.value());

        Fwog::Cmd::BindSampledImage(0, skybox.texture.value(), sampler);
        Fwog::Cmd::BindVertexBuffer(0, skybox.vertexBuffer.value(), 0, 3 * sizeof(float));
        Fwog::Cmd::Draw(Primitives::skyboxVertices.size() / 3, 1, 0, 0);
    };

    if (_skyboxVisible)
        drawSkybox(skybox.value(), nearestSampler, sceneCamera.value());
As a side note, this also shows the additional strength of pipeline objects as it allows an easier management of making skybox to follow a depth comparison operator of LESS_OR_EQUAL while the rest of the scene can use a different depth comparison operator without having to track the global state being altered by glDepthFunc. This can be seen in the static creation functions for skybox pipeline and the draw object pipeline respectively.
The skybox example also gives a brief introduction to texture uploads in Fwog. The function BindSampledImage takes in the texture and the sampler object.
Examples
Finally, the Fwog repo comes with some built-in examples. The following screenshots include a Hello Triangle example and a glTF viewer example. In addition to demonstrating the use of Fwog with a scene loader, the latter also acts an example showcasing the use of a gbuffer for deferred rendering. It is a possible stepping stone up from the template. The examples can be seen in more detail here
They are quite useful as a form of documentation to understand ways of doing things. For example, 03_gltf_viewer gives an example of drawing a scene of meshes with materials.
1
2
3
4
5
6
7
8
9
10
11
12
13
14
15
16
      for (uint32_t i = 0; i < static_cast<uint32_t>(scene.meshes.size()); i++)
      {
        const auto& mesh = scene.meshes[i];
        const auto& material = scene.materials[mesh.materialIdx];
        materialUniformsBuffer.UpdateData(material.gpuMaterial);
        if (material.gpuMaterial.flags & Utility::MaterialFlagBit::HAS_BASE_COLOR_TEXTURE)
        {
          const auto& textureSampler = material.albedoTextureSampler.value();
          auto sampler = textureSampler.sampler;
          sampler.lodBias = fsr2LodBias;
          Fwog::Cmd::BindSampledImage(0, textureSampler.texture, Fwog::Sampler(sampler));
        }
        Fwog::Cmd::BindVertexBuffer(0, mesh.vertexBuffer, 0, sizeof(Utility::Vertex));
        Fwog::Cmd::BindIndexBuffer(mesh.indexBuffer, Fwog::IndexType::UNSIGNED_INT);
        Fwog::Cmd::DrawIndexed(static_cast<uint32_t>(mesh.indexBuffer.Size()) / sizeof(uint32_t), 1, 0, 0, i);
      }
What was it like using Fwog in a game project?
I tried out Fwog and tested it through making a simple aircraft simulation game.
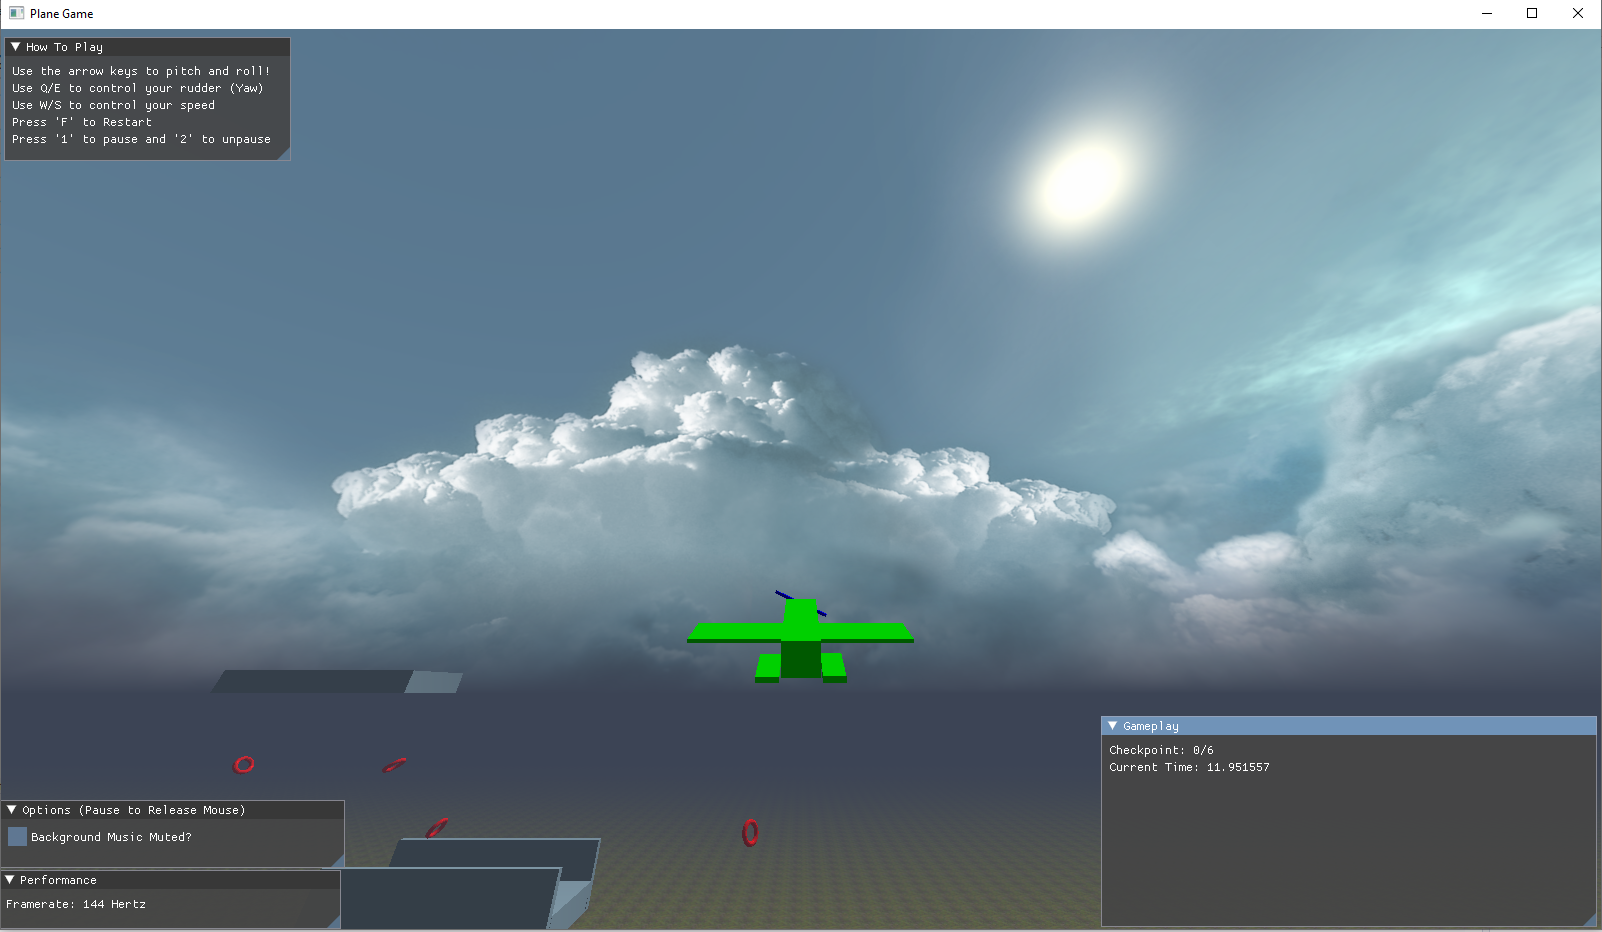
I originally started from the 01_hello_triangle example from the Fwog repo. This was a mistake as Fwog is meant to be accessed as a library, making it difficult to update the library. This was one of the motivations for creating the template.
In earlier prototyping, I had some minor difficulties adjusting to using the swapchain to define the depth buffer rather than using OpenGL’s Depth test function calls. I had adjusted by studying the source code examples from Fwog and applying what I had learned from how Vulkan handles the depth buffer inside pipelines.
Fwog is easy to use with RenderDoc too so debugging was very manageable. Unrelated but I only recently realized that RenderDoc was short for Render Doctor and not Render Documentation.
It was relatively smooth sailing (or flying) from here on out. It wasn’t hard to create draw commands for debug line rendering and I even helped discover a bug with the skyboxes that was fixed quickly. More that can be read in this post dedicated to this topic.
My prototyping phase was messy, with a lot of repeated code and an increasingly chaotic global state. Regardless of that, refactoring it and making the template from my experience was a painless experience.
Conclusion
I’d continue to use Fwog for toy projects and experimentation due to that ease, although it could never replace working with OpenGL directly for some educational goals. Having it as complimentary can allow me to have projects that focus more on shader magic or spatial acceleration structures in addition to more raw OpenGL projects that would benefit from dealing with the buffers directly.
Fwog is fun. I can easily recommend it for the hobbyist graphics programmer due to its source code being easily accessible when debugging, its interface and abstractions being easy to use and for still allowing access to the OpenGL API if needed or wanted.
I have yet to test its support for Tessellation shaders. Maybe that can be a suitable subject of a future article.
Comments powered by Disqus.